Azure Automation delivers a cloud-based automation and configuration service that provides consistent management across your Azure and non-Azure environments. It consists of process automation, update management, and configuration features. Azure Automation provides complete control during deployment, operations, and decommissioning of workloads and resources. It can automate frequent, time-consuming, and error-prone cloud management tasks. This automation helps you focus on work that adds business value.
Azure Automation manages across the lifecycle of your infrastructure and applications. Transfer knowledge into the system on how the organization delivers and maintains workloads. Author in common languages like PowerShell, desired state configuration, Python, and graphical runbooks. Common scenarios for Automation:
- Build / Deploy resources: Deploy VMs across a hybrid environment using Runbooks and Azure Resource Manager templates. Integrate into development tools like Jenkins and Azure DevOps.
- Configure VMs: Assess and configure Windows and Linux machines with the desired configuration for the infrastructure and application.
- Monitor: Identify changes on machines that are causing issues and remediate or escalate to management systems.
- Protect: Quarantine VM if security alert is raised. Set in-guest requirements.
- Govern: Set up role-based access control for teams. Recover unused resources.
Also, Azure Automation can be used for specific Microsoft 365 tasks, like monitor Office 365 Groups and Microsoft Teams creation, expiration, and changes to those workloads, export mailbox audit logs, fill Azure Administrative Units with user objects, etc.
Many small companies are completely in the cloud and don’t have any kind of on-premises server or management server available to run individual PowerShell scrips. At least, this is a good alternative method for running automated tasks in Azure without existing hardware.
Azure Administrative Units
In a nutshell, Azure AU’s simply groups your users into logical units. It allows you to grant admin permissions that are restricted to a department, region, or other segments of your organization. An admin will be able to perform various tasks against all users within the scope of an administrative unit. More information can be found in my other blog post here.
Azure Automation and Administrative Units
You might have many different logical organization units within your organization and there could be a need to automatically fill Azure AU’s with user objects based on their UPN value or other attributes where your objects should be segmented. Azure Automation and Graph API can help you to automate those things properly.
For security reasons, I prefer the connect to Graph API using a certificate. The advantage is that you don’t have to store secrets (even if you should use Azure Key Vault or a credential asset and never store passwords readable in any of your scripts) and just use the certificate to authenticate against the service. I highly recommend the article of Alex Asplund as he shows how to connect to Graph API in different ways for automation.
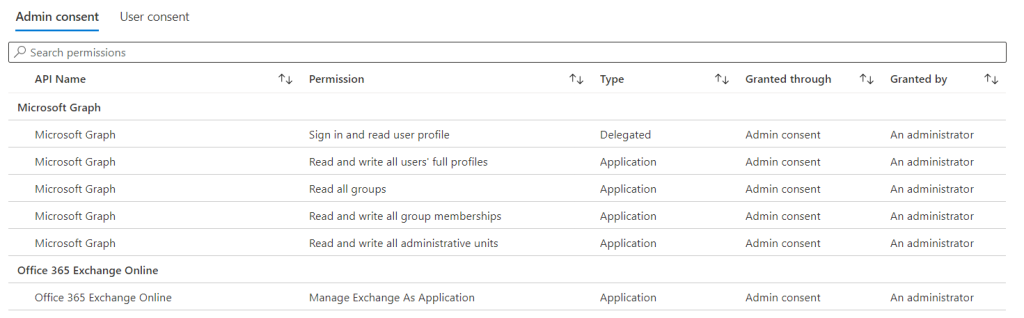
In the first step, create an Enterprise application in the Azure portal with your required permissions. As an example, I also use the EXOv2 PowerShell module to securely connect to Exchange Online PowerShell with the same certificate and therefore I added the EXO permissions to my app, too.
Next, prepare your Azure Automation account and upload your certificate.

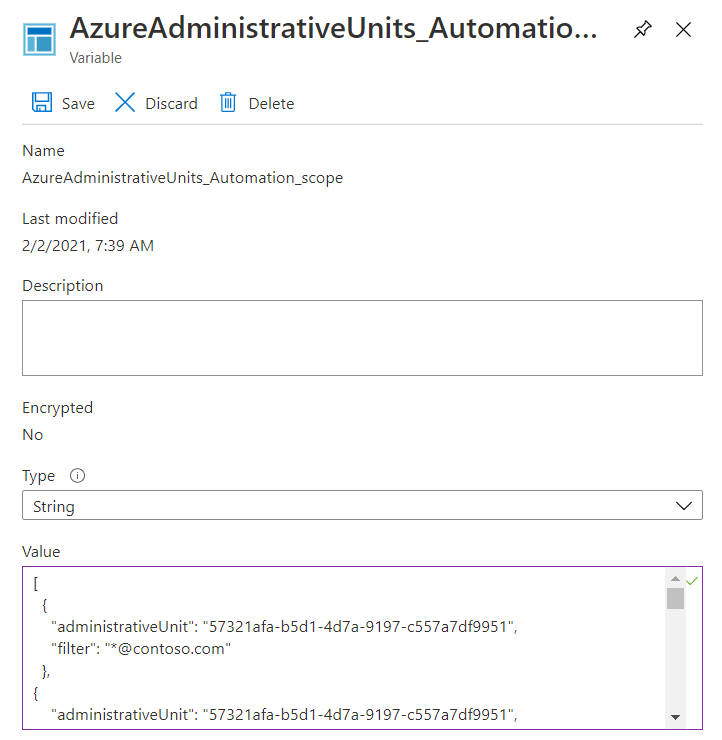
It’s easier if you define variables for your certificate thumbprint, the AU id itself, and the filtering value for user objects that should be included in this particular AU.
Last but not least you have to create your runbook with the PowerShell code to connect to Graph API and do the filtering. In this step, use your preferred method to connect, either credentials or certificate, and then you can use this sample function based on UPN filtering to add all user objects to the AU.
# Get all users in tenant function
Get-AllUsers {     $QueryResults = @()     $Uri = 'https://graph.microsoft.com/v1.0/users?$select=mailnickname,userprincipalname,mail,proxyaddresses,id'
     do {         $Results = Invoke-RestMethod -Uri $Uri -Headers (Get-RequestHeader) -Method Get -ContentType "application/json"
         if ($Results.value) {             $QueryResults += $Results.value         }         else {             $QueryResults += $Results         }         $uri = $Results.'@odata.nextlink'     } until (!($uri))     return $QueryResults }

function Get-AdministrativeUnitMembers($unitId) {     $QueryResults = @()     $Uri = 'https://graph.microsoft.com/v1.0/directory/administrativeUnits/' + $unitId + '/members'     do {         $Results = Invoke-RestMethod -Uri $Uri -Headers (Get-RequestHeader) -Method GET -ContentType "application/json"         if ($Results.value) {             $QueryResults += $Results.value         }         else {             $QueryResults += $Results         }         $uri = $Results.'@odata.nextlink'          }until(!($uri))     return $QueryResults }

function Add-AdministrativeUnitMember ($unitId, $memberId) {     $body = @{         "@odata.id" = "https://graph.microsoft.com/v1.0/users/" + $memberId     }     $Uri = 'https://graph.microsoft.com/v1.0/directory/administrativeUnits/' + $unitId + '/members/$ref'     Invoke-RestMethod -Uri $Uri -Headers (Get-RequestHeader) -Method POST -ContentType "application/json" -body ($body | ConvertTo-Json) }

#-[Initialisations]-
$TenantName = get-automationvariable WGF_groupAutomation_tenantName $AppId = get-automationvariable WGF_groupAutomation_appId $Certificate = Get-AutomationCertificate -Name WGF_groupAutomation_cert $scope = get-automationvariable -Name AzureAdministrativeUnits_Automation_scope| ConvertFrom-Json

#-[Execution]-
# Since we cannot filter on UPN at request level we have to get all users and filter the results afterwards
$allUsers = Get-AllUsers $scope | % {     $unitId = $_.administrativeUnit     $filter = $_.filter     $usersInScope = $allUsers | ? { $_.userPrincipalName -like $filter }     $allUnitMembers = Get-AdministrativeUnitMembers -unitId $unitId          foreach ($user in $usersInScope) {         if ($allUnitMembers.id -contains $user.id) {             write-output ($unitId + ' | Already a member: ' + $user.userPrincipalName)         }         else {             write-output ($unitId + ' | Adding Member : ' + $user.userPrincipalName)             Add-AdministrativeUnitMember -unitId $unitId -memberId $user.Id         }     } }
You can configure your scheduled runtime settings or just manually start the Runbook and your user objects will automatically appear in the defined Administrative Unit.
A big thank you to my friend and colleague Andreas, who works as a Cloud Automation Architect, who helped my customer and me with the Automation architecture in Azure, the development of this Runbook, and a lot of more automation tasks.

I haven’t tried this yet Dominik, but my thanks for putting this together. Working for a group of schools who share a single tenant, AUs seem like a fantastic idea until you start having to manually manage student account churn.
LikeLike